2021-01-20
1.MPU6050(자이로 가속도 센서)
MPU6050센서는 자이로 가속도 센서로 아두이노 우노에 연결하여 가속도를 측정하기 위해 작동 환경을 구성하였다.
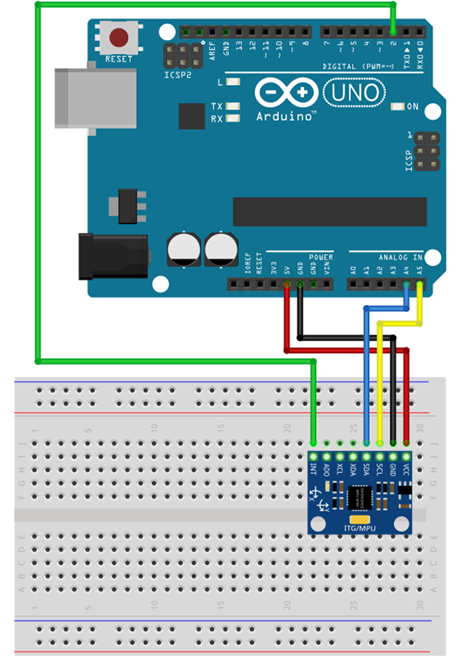
1-1. 아두이노 우노와 센서의 pin 연결.
실습현장:)
 크기 설정")
1-2. 라이브러리.
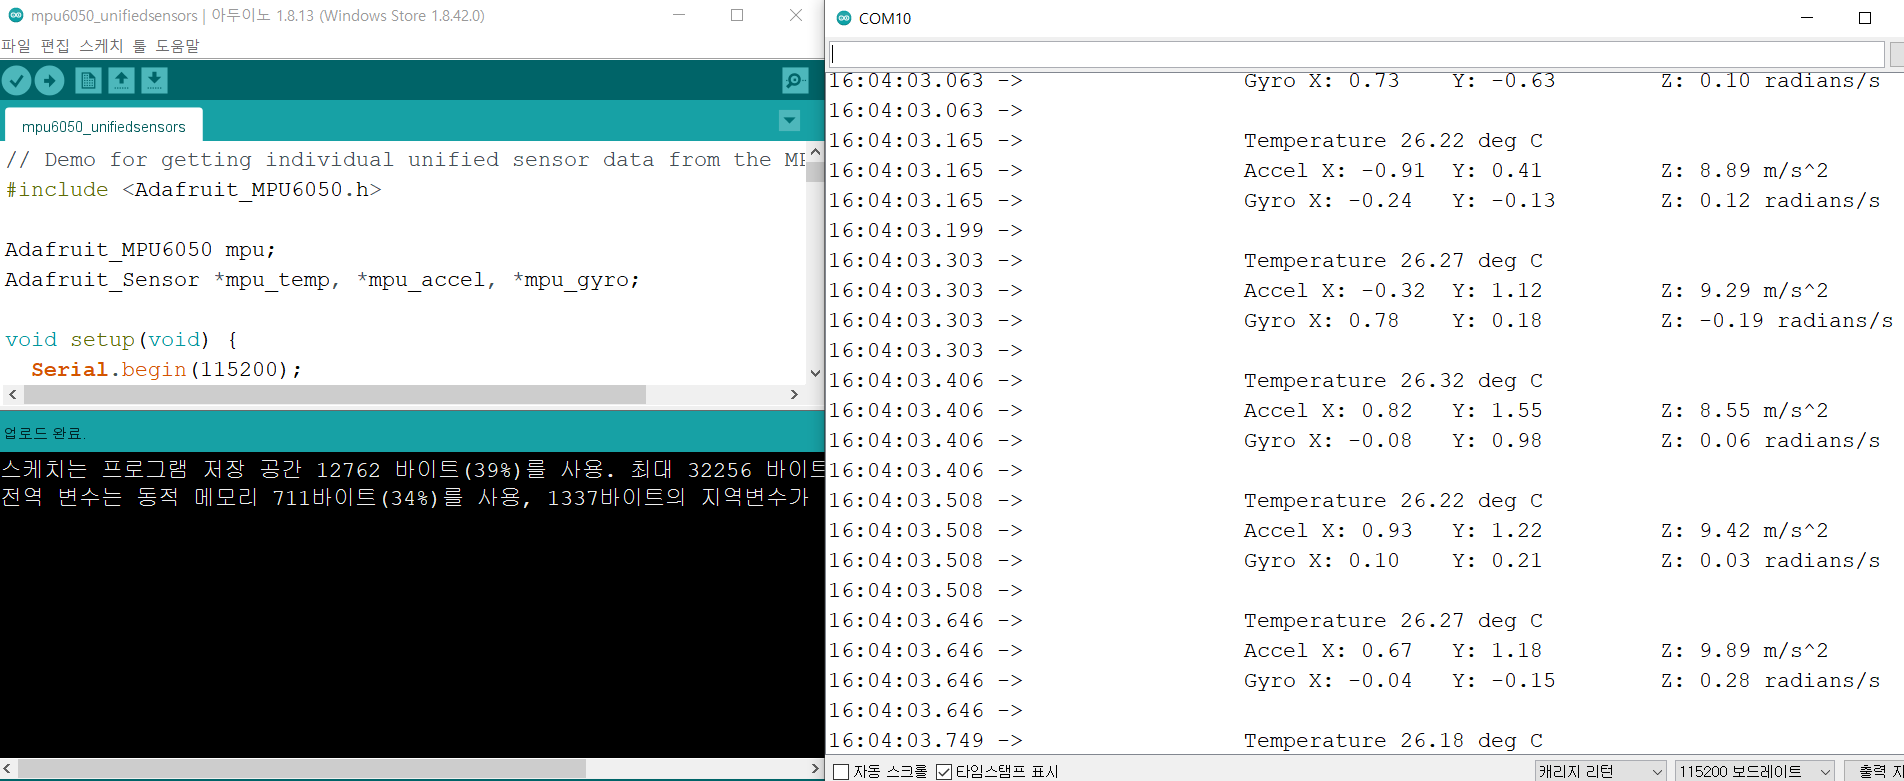
-아래사이트에서 라이브러리를 참조하였다. 가속도 센서는 라이브러리 예제중 mpu6050_unifiedsensors 사용하였고 소스코드는 다음과 같다.
소스코드, 라이브러리 참조 : https://blog.naver.com/eduino/221081288204
// Demo for getting individual unified sensor data from the MPU6050
#include <Adafruit_MPU6050.h>

Adafruit_MPU6050 mpu;
Adafruit_Sensor *mpu_temp, *mpu_accel, *mpu_gyro;

void setup(void) {
  Serial.begin(115200);
  while (!Serial)
    delay(10); // will pause Zero, Leonardo, etc until serial console opens

  Serial.println("Adafruit MPU6050 test!");

  if (!mpu.begin()) {
    Serial.println("Failed to find MPU6050 chip");
    while (1) {
      delay(10);
    }
  }

  Serial.println("MPU6050 Found!");
  mpu_temp = mpu.getTemperatureSensor();
  mpu_temp->printSensorDetails();

  mpu_accel = mpu.getAccelerometerSensor();
  mpu_accel->printSensorDetails();

  mpu_gyro = mpu.getGyroSensor();
  mpu_gyro->printSensorDetails();
}

void loop() {
  //  /* Get a new normalized sensor event */
  sensors_event_t accel;
  sensors_event_t gyro;
  sensors_event_t temp;
  mpu_temp->getEvent(&temp);
  mpu_accel->getEvent(&accel);
  mpu_gyro->getEvent(&gyro);

  Serial.print("\t\tTemperature ");
  Serial.print(temp.temperature);
  Serial.println(" deg C");

  /* Display the results (acceleration is measured in m/s^2) */
  Serial.print("\t\tAccel X: ");
  Serial.print(accel.acceleration.x);
  Serial.print(" \tY: ");
  Serial.print(accel.acceleration.y);
  Serial.print(" \tZ: ");
  Serial.print(accel.acceleration.z);
  Serial.println(" m/s^2 ");

  /* Display the results (rotation is measured in rad/s) */
  Serial.print("\t\tGyro X: ");
  Serial.print(gyro.gyro.x);
  Serial.print(" \tY: ");
  Serial.print(gyro.gyro.y);
  Serial.print(" \tZ: ");
  Serial.print(gyro.gyro.z);
  Serial.println(" radians/s ");
  Serial.println();

  delay(100);

  /*   serial plotter friendly format
  Serial.print(temp.temperature);
  Serial.print(",");

  Serial.print(accel.acceleration.x);
  Serial.print(","); Serial.print(accel.acceleration.y);
  Serial.print(","); Serial.print(accel.acceleration.z);
  Serial.print(",");

  Serial.print(gyro.gyro.x);
  Serial.print(","); Serial.print(gyro.gyro.y);
  Serial.print(","); Serial.print(gyro.gyro.z);
  Serial.println();
  delay(10);
  */
}
1-3 결과
성공적으로 가속도를 측정함으로써 MPU6050 센서의 작동 환경을 구성하였다.
2.HCM5883L (지자계센서)
HCM5883L센서는 지구의 자기장을 이용하는 지자계센서로 아두이노 우노에 연결하여 향하는 방향을 측정하기위해 작동환경을 구성하였다.
1-1. 아두이노 우노와 센서의 pin 연결

실습현장:)
 크기 설정")
1-2. 라이브러리.
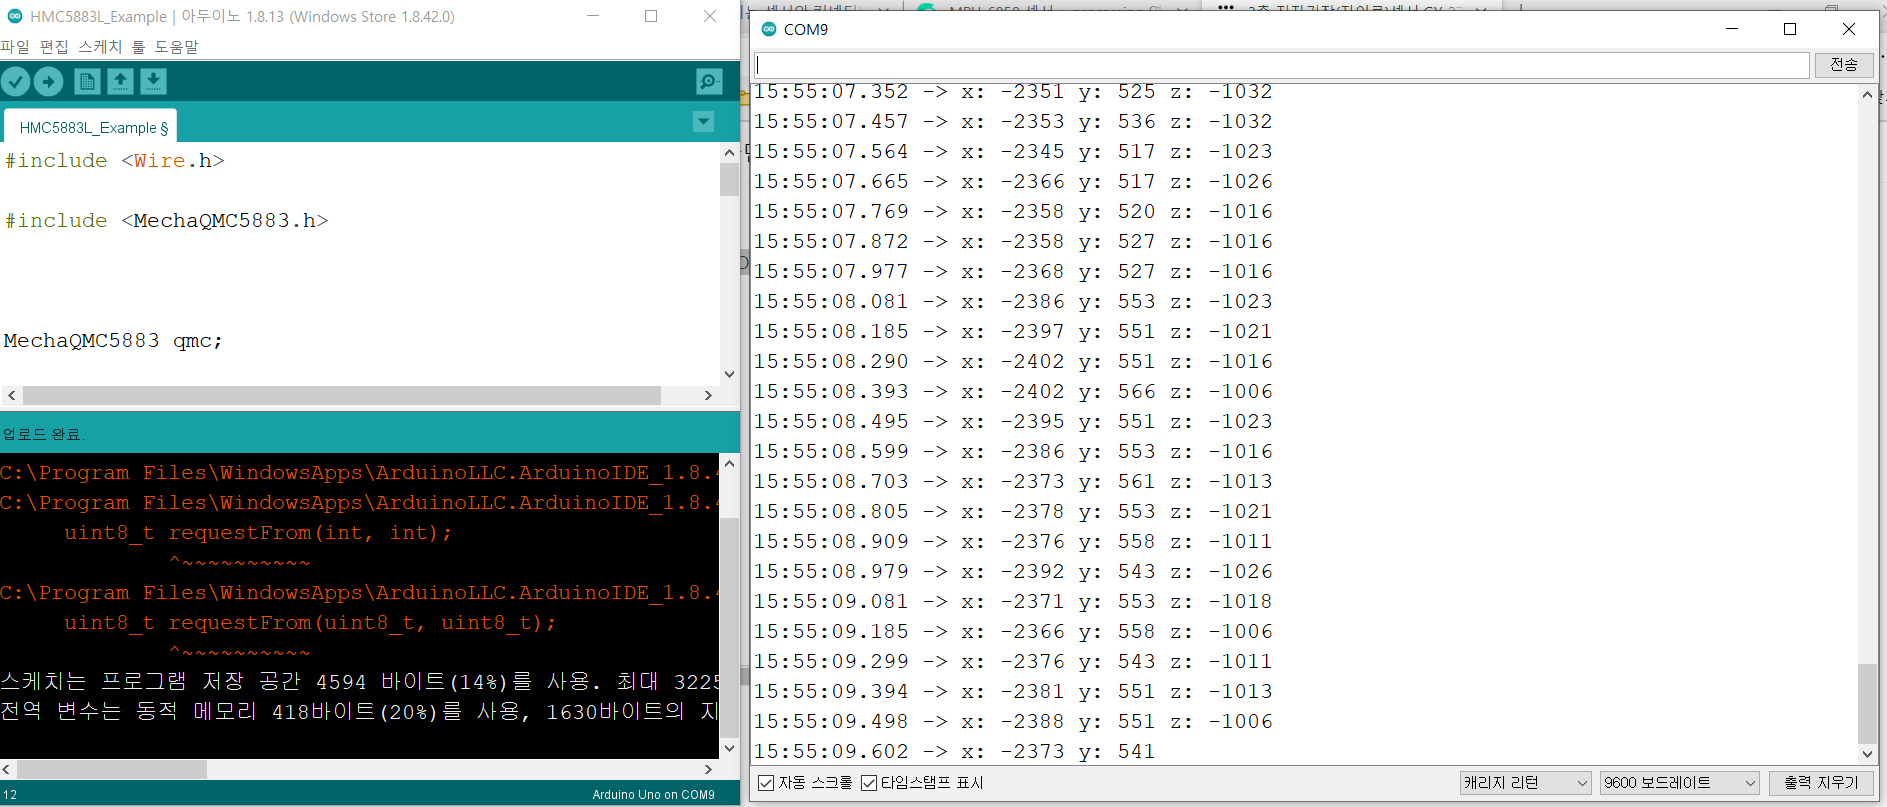
-아래사이트에서 라이브러리를다운받아 사용하였다. 자기장센서의 소스코드는 다음과 같다.
소스코드, 라이브러리 참조 : https://blog.naver.com/roboholic84/221002707148
#include <Wire.h>
#include <MechaQMC5883.h>
MechaQMC5883 qmc;

void setup() {

  Wire.begin();
  Serial.begin(9600);
  qmc.init();
  //qmc.setMode(Mode_Continuous,ODR_200Hz,RNG_2G,OSR_256);

}
void loop() {
  int x,y,z;
  qmc.read(&x,&y,&z);

  Serial.print("x: ");
  Serial.print(x);
  Serial.print(" y: ");
  Serial.print(y);
  Serial.print(" z: ");
  Serial.print(z);
  Serial.println();
  delay(100);
}
1-3. 오류
-계속 같은 값만 출력되어 해결방법을 찾아보았다.(센서 인식의 문제?)
- 주소에러 -> I2C통신방식으로 소스 코드에서는 주소가 0x1E 였는데
- 주소를 확인를 이용해 확인해본 결과 0x0D의 주소를 사용하고있었다.
- 주소 코드 0X0D로 수정
주소확인코드
// --------------------------------------
// i2c_scanner
// Version 1
//    This program (or code that looks like it)
//    can be found in many places.
//    For example on the Arduino.cc forum.
//    The original author is not know.
// Version 2, Juni 2012, Using Arduino 1.0.1
//     Adapted to be as simple as possible by Arduino.cc user Krodal
// Version 3, Feb 26  2013
//    V3 by louarnold
// Version 4, March 3, 2013, Using Arduino 1.0.3
//    by Arduino.cc user Krodal.
//    Changes by louarnold removed.
//    Scanning addresses changed from 0...127 to 1...119,
//    according to the i2c scanner by Nick Gammon
//    https://www.gammon.com.au/forum/?id=10896
// Version 5, March 28, 2013
//    As version 4, but address scans now to 127.
//    A sensor seems to use address 120.
// Version 6, November 27, 2015.
//    Added waiting for the Leonardo serial communication.
// This sketch tests the standard 7-bit addresses
// Devices with higher bit address might not be seen properly.

#include <Wire.h>
void setup()
{
  Wire.begin();
  Serial.begin(9600);
  while (!Serial);             // Leonardo: wait for serial monitor
  Serial.println("\nI2C Scanner");
}
void loop()
{
  byte error, address;
  int nDevices;
  Serial.println("Scanning...");
  nDevices = 0;
  for(address = 1; address < 127; address++ )
  {
    // The i2c_scanner uses the return value of
    // the Write.endTransmisstion to see if
    // a device did acknowledge to the address.
    Wire.beginTransmission(address);
    error = Wire.endTransmission();
    if (error == 0)
    {
      Serial.print("I2C device found at address 0x");
      if (address<16)
        Serial.print("0");
      Serial.print(address,HEX);
      Serial.println("  !");
      nDevices++;
    }
    else if (error==4)
    {
      Serial.print("Unknown error at address 0x");
      if (address<16)
        Serial.print("0");
      Serial.println(address,HEX);
    }
  }
  if (nDevices == 0)
    Serial.println("No I2C devices found\n");
  else
    Serial.println("done\n");

  delay(5000);           // wait 5 seconds for next scan
}
- 시리얼 포트 파라미터 설정중 에러
-하드웨어 연결부분 다시 재연결로 문제를 해결하였다. 기본적인 부분에서도 문제가 발생하기 쉬우니 주의하기 !
hmC짝퉁
-열심히 찾아보며 오류를 해결하려고 하였으나 QMC » xyz 값 -1로 계속 같은 값만 나오며 해결하지 못했다. 그러다 참조사이트를 통해 이러한 오류를 접하는 사람들이 여럿 있다는 것을 알게되었다.
이러한 문제는 HMC5883L센서가 정품이 아니여서 정품을 기준으로 한 오픈소스코드가 맞지 않기 때문이다. 그래서 참조사이트에서 정품이 아닌 QMC센서의 라이브러리 다운받아서 실행해보니 문제가 해결되었다.ㅜ
참조 사이트: https://clemencyking.tistory.com/m/4
1-3 결과
많은 오류를 해결하고 성공적으로 자기장에따른 방향을 측정함으로써 HMC5883L센서의 작동 환경을 구성하였다. 행복-